
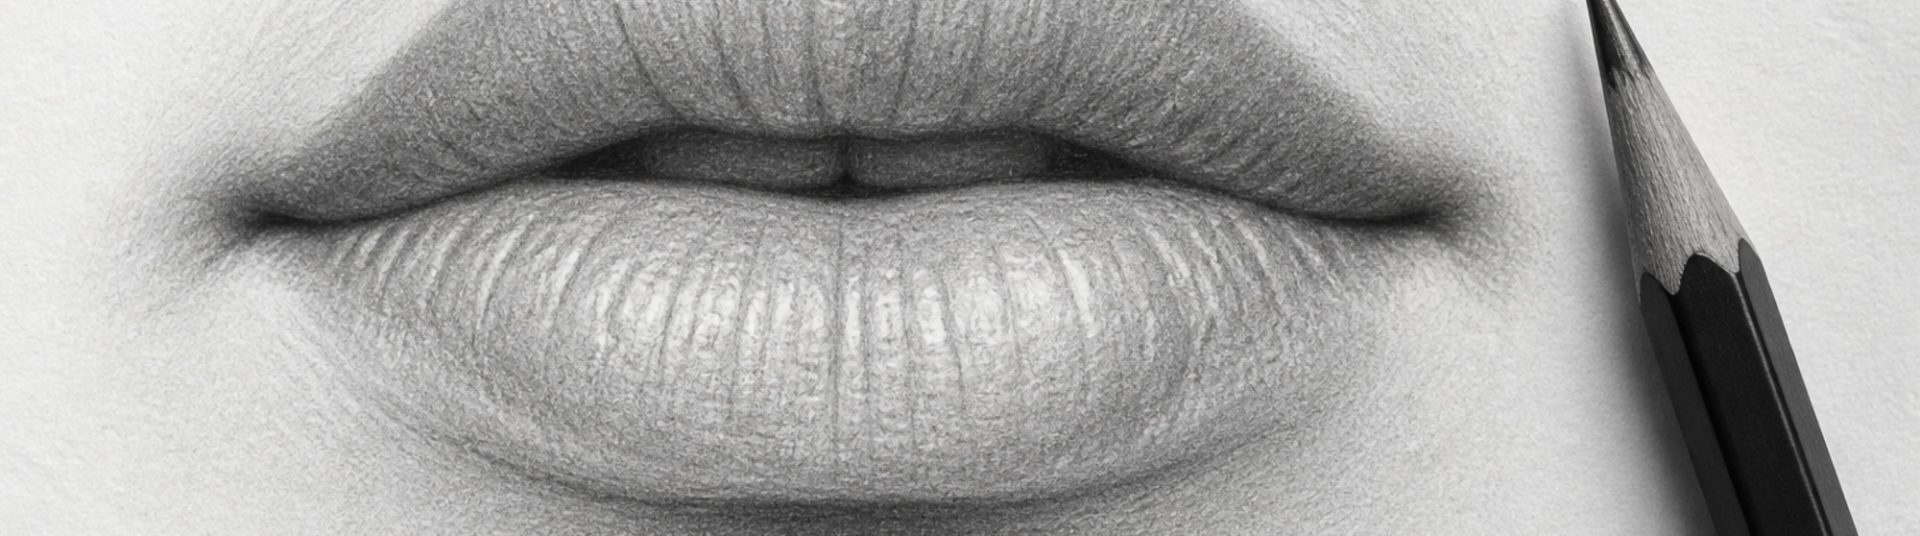
How to Draw Lips and Mouths in Pencil Portraits: Complete Tutorial
Drawing realistic lips and mouths in pencil can transform a portrait from good to striking. The mouth expresses emotion and personality, yet many artists struggle with proportion, symmetry and subtle colour shifts in graphite. This tutorial shows how to draw lips in pencil step by step for commission portraits, pet-owner likenesses and fine art drawings.
1) Understanding Mouth Structure
Lips are soft forms wrapped around the teeth and jaw. The upper lip usually appears darker because it slopes inward; the lower lip catches more light and often shows a stronger highlight.
Forms to observe:
Cupids bow on the upper lip
Centre line where lips meet
Corner folds (commissures)
Philtrum grooves above the upper lip
Shadow beneath the lower lip on the chin
2) Tools for Drawing Lips in Pencil
HB and 2B for initial structure; 4B for shadow depth; kneaded eraser for highlights; blending stump for soft lip texture; sharp pencil for crease detail on aged subjects.
3) Proportion and Placement
The mouth sits in the lower third of the face. Width often aligns between the pupils or inner iris depending on angle. Check that corners align with the eyes on a three-quarter turn — incorrect mouth placement is a frequent portrait error.
4) Step-by-Step Lip Drawing Process
A) Mark the mouth line
Lightly draw the centre seam and corner points. Avoid dark lines — lips have soft edges.
B) Shape the upper and lower lip
Build two soft forms. The upper lip is usually more angular; the lower lip is fuller and rounder.
C) Apply base tone
Shade the upper lip slightly darker with 2B. Leave the lower lip lighter, reserving highlight areas.
D) Add creases and texture
Use fine lines following lip curvature. Do not draw grid-like wrinkles — suggest texture with selective marks.
E) Finish highlights and cast shadow
Lift shine on the lower lip. Shade the shadow under the lower lip to separate mouth from chin.
5) Drawing Smiles, Neutral and Open Mouths
Smiling stretches the upper lip and reveals teeth — simplify teeth as value shapes, not individual white rectangles. Neutral mouths rely on subtle asymmetry for realism. Open mouths require careful tooth grouping and tongue shadow.
6) Teeth in Pencil Portraits
Teeth are rarely pure white in pencil drawings. Use midtones, separate teeth with soft vertical shadows, and darken the mouth interior. Over-bright teeth look unnatural in realistic portrait drawing.
7) Common Lip Drawing Mistakes
– Hard outline around both lips.
– Perfect symmetry in corners and cupids bow.
– Flat shading without upper/lower lip value difference.
– Ignoring the philtrum and chin shadow.
8) Practice Exercises for Lip Drawing
Practise one mouth study daily from reference, focusing on value before detail. Compare upper and lower lip tone in every sketch.
9) Conclusion
Mastering lips and mouths in pencil portraits improves expression and likeness. Observe living models, use clear lighting, and build soft layered tone. With practice, drawing realistic lips becomes one of the most rewarding skills in portrait art.